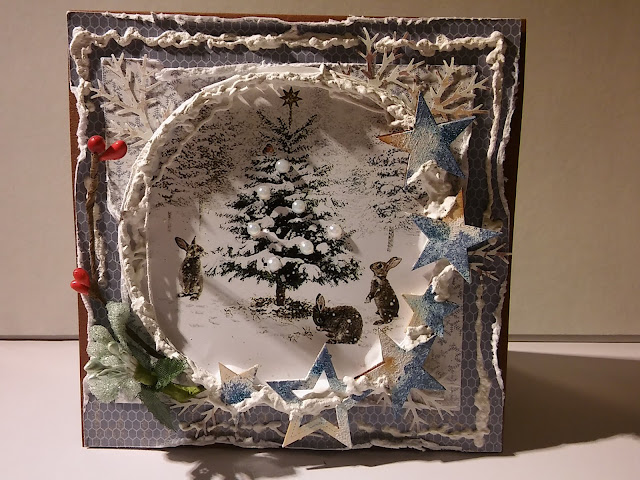
Christmas Card - Do It Yourself Online Course
Hello there :)
It has been a long time since my last online course here. However, I decided to start a new activity on this blog. I will be doing the quick online courses using my mobile phone camera. Let's hope I will be able to continue this new idea in coming new year. Well, we will see but in the meantime - enjoy this Christmas entry.
Below you can see the prepared card already - the effect that we want to achieve.
The first things which we will need to prepare for our Chrsitmas Card are as follows:
- Scissors
- White twine
- White Acrylic
- Thin brush
First, we need to create a circle from the twine and to paint this circle with the white acrylic. Let's do this at the beginning of the work so the acryl will dry to be ready for the next steps in the card creation process. You can put the painted twine in some warm place to expedite the drying process.
Next step is to create shiny card ornamentation. I decided to use stars of cardboard and wood. These raw additions are quite easy to be painted. I used three different acrylics colors and I tried to paint them in artistic, chaotically way.
After painting I used glue on the stars surface and sprinked these ornamentation with blue glitter. The final effect is presented below. Our stars will need a couple of minutes to dry as well.
In the meantime, we can start doing the card. Prepare paper base for the card. We need to cut papers we would like to use - I have chosen papers in blue colors and with winter stars theme. Also, as a central graphic I will use the picture in a circle shape with a christmas tree and cute rabbits in a winter landscape.
At this stage we need more additions to prepare. I cut some white twigs using a punch with this wonderful shape. Also, we will add some twigs imitation on the wire.
Let's start a card creation stage. Glue both chosen papers on a paper base of the card. I did some papers damages with the scissors so the papers look older now.
Now we can prepare the full composition of our card idea. Also, the painted twine is ready to be used in a moment. Decide on which side you would like to add the wire decors. I chose the right side.
Attach the wire decors on the back side of the circle graphic. I used strong birateral 3D tape in a few places on the back so we will have a 3D effect on the front of the card.
Once the graphic is added one the front of our card we can attach the punched paper twigs. Also, we need to glue the edges of the circle graphic and add dried white twine there.
Now we can glue the blue shiny stars. Once done I used the snow pen and I added snow imitation all around the circle graphic and also on the card's edges.


Komentarze
Prześlij komentarz